ChannelsCreate, use and manage channels on prefix.dev
You can upload your conda packages to prefix.dev channels and make them available for your users. You can have multiple channels, for information about the pricing of channels, see the pricing page.
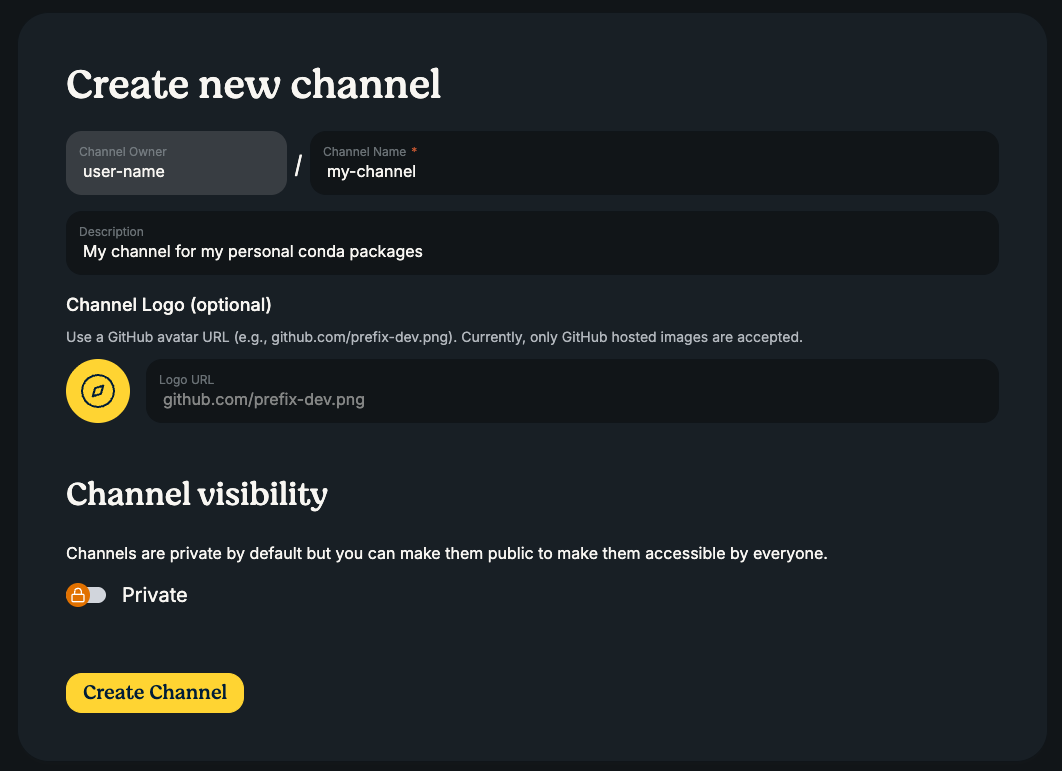
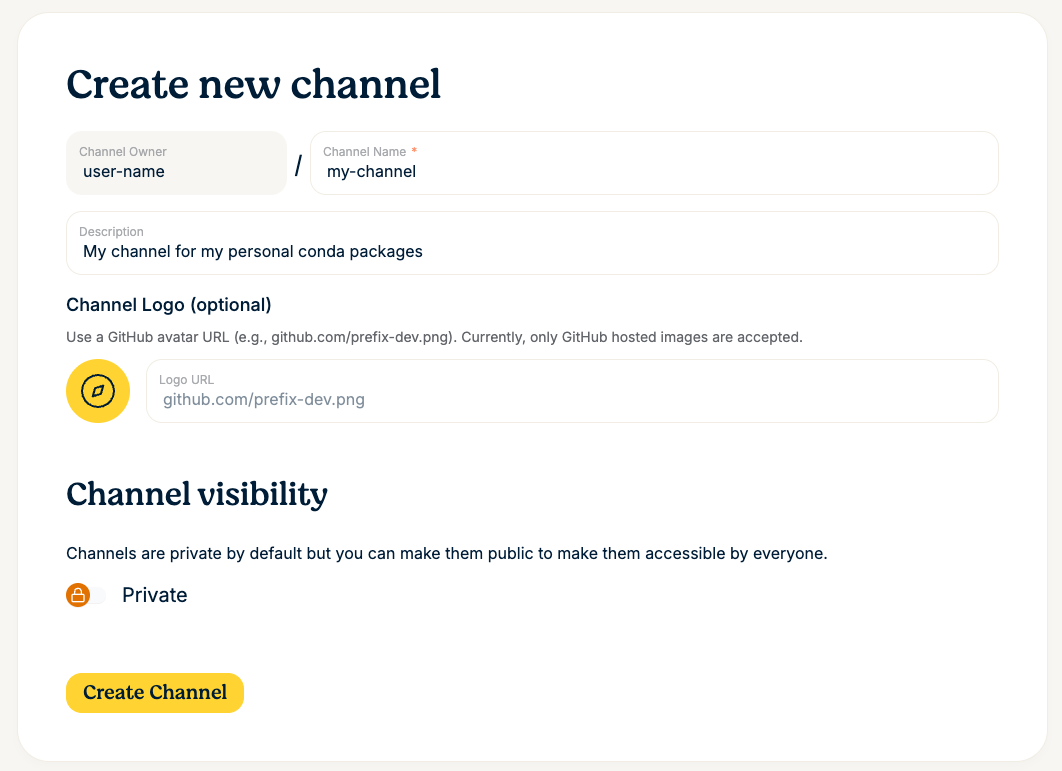
Creating a channel
- Make sure you have an account and are logged in.
- Go here to create a channel.
- Fill in the form and select
Create Channel. You can always change the description, visibility and logo later, but the channel name has to be unique across the platform. - After the channel is created, you can start uploading packages to it and share it with your users.
Uploading to a channel
There are multiple ways to upload packages to a channel.
- Recommended, use trusted publishing from CI/CD pipelines (see below)
- Use our CLI tools locally, such as Pixi or Rattler-build (see below)
- Use the upload page: https://prefix.dev/channels/CHANNEL_NAME/settings/upload (see below)
- Use the API to upload packages (see API docs for more information)
Note: You should never delete a package from a channel that people are depending on. But if you uploaded something that was not allowed you can use the API to delete the file.
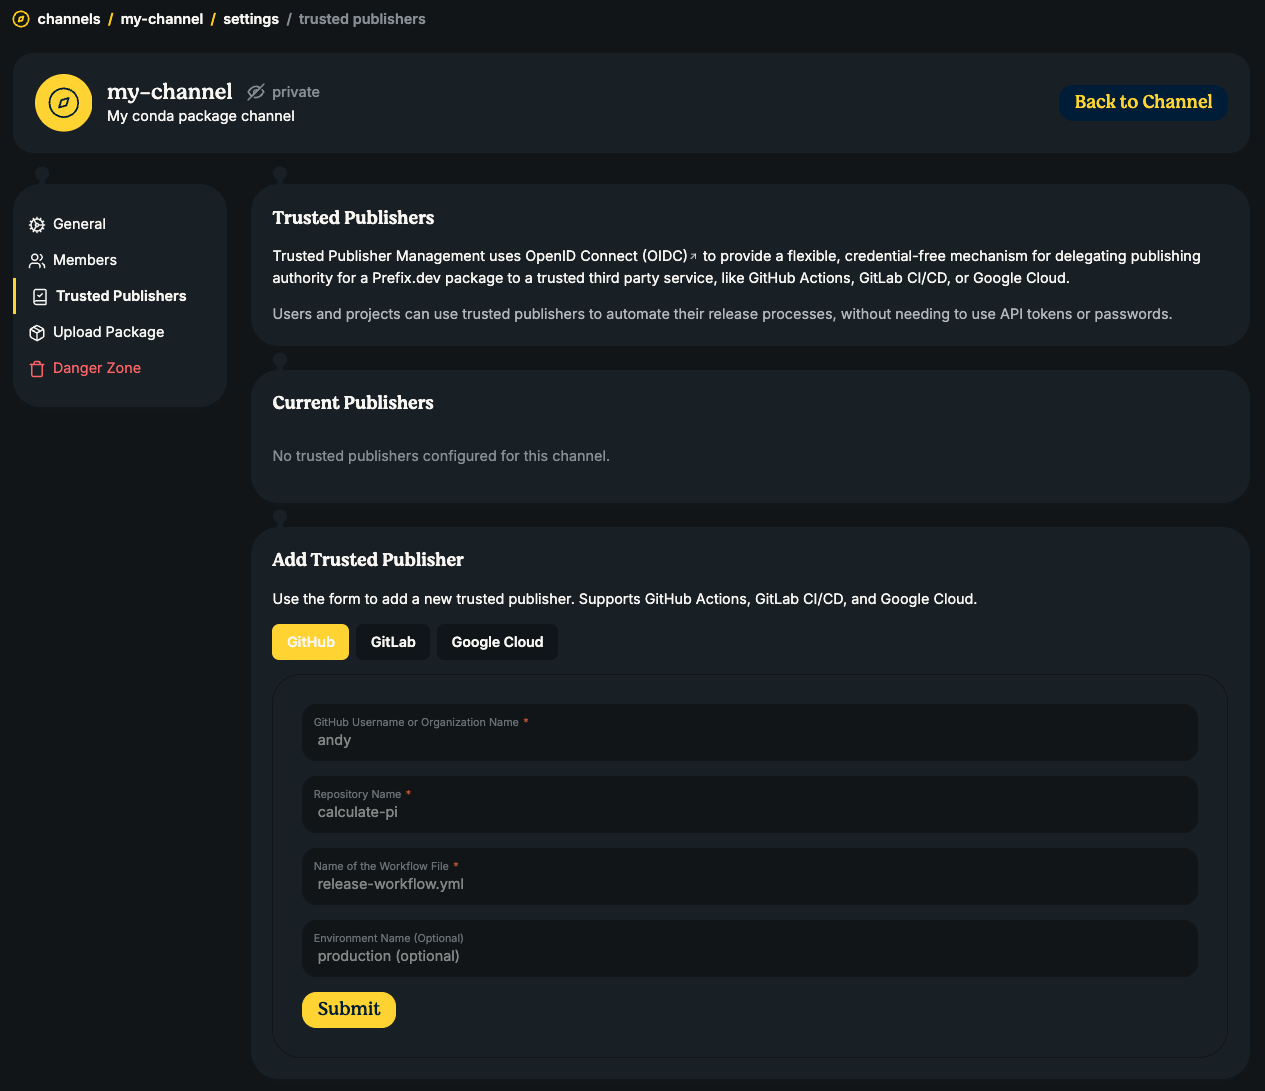
Publish using trusted publishers
You can set up trusted publishers for your channel to allow automated uploads from CI/CD pipelines. This is safer than using API keys because there is no secret stored in the CI/CD system, and you have control over where the packages can come from.
- Go to your channel's settings page: https://prefix.dev/channels/CHANNEL_NAME/settings
- Select the "Trusted publishers" section
- Fill in the form based on the CI/CD system you are using.
- Make sure you already know the name of your CI workflow file.
- Select "Submit"

Then in your CI/CD pipeline, you can use pixi upload or rattler-build upload without any additional authentication steps, and the upload will be automatically authenticated and added to your channel.
For more information:
rattler-buildwith trusted publishers: docs
Uploading packages via Pixi or Rattler-build
Get a API key from your account settings and then run:
pixi upload --channel <channel-name> <package-file> --api-key pfx_xxxxxxxxxxxxxxxxxxxxxxxxxxxx
# or for rattler-build
rattler-build upload prefix --channel <channel-name> <package-file> --api-key pfx_xxxxxxxxxxxxxxxxxxxxxxxxxxxx
You can skip the --api-key flag if you have already authenticated with Pixi, see Pixi authentication for more info.
pixi auth login prefix.dev --token pfx_xxxxxxxxxxxxxxxxxxxxxxxxxxxx
# or for rattler-build
rattler-build auth login https://prefix.dev --bearer pfx_xxxxxxxxxxxxxxxxxxxxxxxxx
You can upload multiple files at the same time with:
pixi upload prefix --channel <channel-name> package-name-*.conda
# or for rattler-build
rattler-build upload prefix --channel <channel-name> package-name-*.conda
Upload page
- Login into the website
- Navigate to the channels page and then a channel that is owned by you.
- Select the "Add Package" button in the right top corner to go to the upload page, (https://prefix.dev/channels/CHANNEL_NAME/upload).
- Drag and drop from your file system into the drop area or select the drop area
to open a file browser.
- Currently only files smaller than 100Mb are allowed.
- The system will automatically validate the file to ensure it's in the correct format for a conda package. If the file doesn't meet these specifications, the upload will not proceed. Contact us when you want to go bigger!
- If the upload is successful, the package variant will be added to your channel and will be available for access.
Install from a channel
Prefix.dev channels can be used with their URL, e.g. https://prefix.dev/mychannel.
All major conda package managers support installing from custom channels, such as Pixi, conda and mamba.
For example, with Pixi you can add a channel and install packages from it with:
# Initialize a new Pixi workspace with the channel
pixi init --channel https://prefix.dev/mychannel
# Add the channel to the workspace configuration
pixi workspace channel add https://prefix.dev/mychannel
# Install a package globally from the channel
pixi global install --channel https://prefix.dev/mychannel mypkg
# Search for a package in the channel
pixi search --channel https://prefix.dev/mychannel mypkg
Public vs. private channels
Public channels are accessible without credentials. To access a private channel, you have to be a member. When accessing private channels, it is also necessary to authenticate with the package manager.
We are using a standard API Key authentication method at prefix (with a "bearer" token). To authenticate Pixi or other conda package managers, please create an API Key as described under API.
To authenticate with Pixi, run:
pixi auth login prefix.dev --token pfx_thisisialongtoken123This will store the authentication token in your Pixi configuration.
Note: For other package managers like (micro)mamba, use:
(micro)mamba auth login https://prefix.dev --bearer pfx_token
Channel members
A channel can have two types of members: owners and "regular" members.
- Owners have administrative rights, can upload new packages and add more members.
- Members can only download from a channel (this is only useful for private channels).
Add members
You can add members through the API, or through the frontend:
- Select the
Memberstab in a channel page. - Select the
Add memberbutton in the right top corner of the channel member page. - Search for a member, if they're not signed in yet, you can't add the member.
- Select a role for the new member.
- Select the
Add Memberbutton.
Channel structure and subdirectories
Packages are organized by platform subdirectories (subdirs). Each subdir represents a specific platform:
Common subdirectories:
linux-64- 64-bit Linux (Intel/AMD)linux-aarch64- 64-bit Linux (ARM)osx-64- macOS Intelosx-arm64- macOS Apple Siliconwin-64- 64-bit Windowsnoarch- Platform-independent packages (pure Python, meta packages, etc.)
Every channel has a noarch subdir, even if empty. Package managers use this to test if a channel exists.
Channel URL structure
https://prefix.dev/mychannel
├── noarch
│   ├── shards
│   │   ├── <shards_base_url><sha256>.msgpack.zst
│   │   └── ...
│   ├── repodata_shards.msgpack.zst
│   └── repodata.json
├── linux-64
│   ├── shards
│   │   ├── <shards_base_url><sha256>.msgpack.zst
│   │   └── ...
│   ├── repodata_shards.msgpack.zst
│   ├── repodata.json
│   ├── mypkg-1.1-h1234.tar.bz2
│   ├── mypkg-1.2-h4434.tar.bz2
│   └── mypkg-1.3-h2334.tar.bz2
└── osx-arm64
    ├── shards
    │   ├── <shards_base_url><sha256>.msgpack.zst
    │   └── ...
    ├── repodata_shards.msgpack.zst
    ├── repodata.json
    └── mypkg-1.1-h5678.conda
Each subdir contains:
repodata.json- Index of all packages in that subdir, e.g. conda-forge/noarchrepodata_shards.msgpack.zst- Index of all package names in that subdir, e.g. conda-forge/noarchshards/- The folder containing the repodata_shards files for all the packages in the subdir.- Package files (
.tar.bz2or.condaformat)
More information on the sharded repodata can be found in the CEP
Package URL format: https://prefix.dev/<channel>/<subdir>/<filename>